.308 Norma Magnum Load Development
This load development started off with the Norma Bondstrike 180gr .30 caliber bullet. The Bondstrike is an impressive big game bullet and is well designed inside and out. It features a heavy-duty copper-alloy jacket bonded to a lead core and is topped with a polymer tip. It has a long boattail and sleek ogive. This bullet is built and designed to drop game in its tracks at all ranges, near and far. The Bondstrike is a premium option from Norma.
Before I got into any loading or testing, I wanted to get an idea of how consistent and well made the Bondstrikes were. To do this, I decided to randomly select 10 from the box I had, weigh them and measure them from base to ogive (BTO). A consistent weight and a consistent BTO is a good indication of how well the bullets are manufactured and how good quality control is. Some bullets may still shoot well at closer ranges, even if they’re not consistent, but to be effective at long range you need consistency. I compared the 10 Norma Bondstrikes to 10 bullets randomly selected from two other bullet manufacturers. The other two bullets were marketed as being match grade whereas the Norma Bondstrike is only marketed as a hunting bullet. Having said that, the Bondstrike actually was as consistent or more consistent overall compared to the two match bullet options I had on hand. I was very impressed with this and below is a chart showing the results from the Bondstrike weight and BTO measurements.
|
Norma Bondstrike 180gr .30 cal Weight Data |
|
|
Average Weight |
180.12 GR |
|
Maximum Weight |
180.18 GR. |
|
Minimum Weight |
180.00 GR. |
|
Extreme Spread |
0.18 GR. |
|
Norma Bondstrike 180gr .30 cal BTO Data |
|
|
Average BTO |
0.7005” |
|
Maximum BTO |
0.7015” |
|
Minimum BTO |
0.700” |
|
Extreme Spread |
0.0015” |
I tested the Bondstrike in my accurate custom .308 Norma Magnum. As I have mentioned in my previous article, The Excellent .308 Norma Magnum, this rifle is built on a Remington 700 action using a Bartlein 5R 1-9 twist barrel, custom muzzle brake, B&C M40 stock, TriggerTech Primary, topped with a Sightron STAC 4-20x50 in a DNZ one-piece mount. This rifle has proven to shoot multiple loads and bullets well, with the best groups being under 0.200 of an inch! This was the perfect rifle to test the Norma Bondstrike bullets in.
I began load development with new Norma brass. The brass was mandrel expanded for .0025 neck tension, inside case necks nylon brushed, outside of case mouths deburred, and inside of case mouths chamfered with a VLD tool from Lyman. I recommend starting serious load development with brass fired in your rifle’s chamber, but I had a lot of new brass that needed fire formed in my chamber. Fully formed fired brass will often give more consistent results and will have more case volume compared to new brass. Excellent results can still be achieved with new brass, though, as you will see soon!
Next, I disassembled my bolt to remove the firing pin spring assembly and removed my plunger ejector and spring. This allows the bolt to open and drop closed on an empty chamber effortlessly and without any spring resistance. I then took a dummy round sized to have .002 shoulder bump and a Bondstrike seated intentionally very long. I chambered this round and attempted to close the bolt, but the bullet was jammed too deep into the lands to allow the bolt to close. From here I progressively started seating the projectile deeper and deeper until I was able to close the bolt with some effort and with a slight “click” when opening the bolt. I noted that cartridge base to ogive (CBTO) length using a set of digital calipers and the Hornady CBTO bullet insert kit. I started to adjust the depth in .001 increments. I worked back until the bolt would freely close on the dummy round without issue and there was no audible “click” when opening the bolt. This determined the position where the bullet was right at the start of the lands, and I noted this measurement as being my length to the lands.
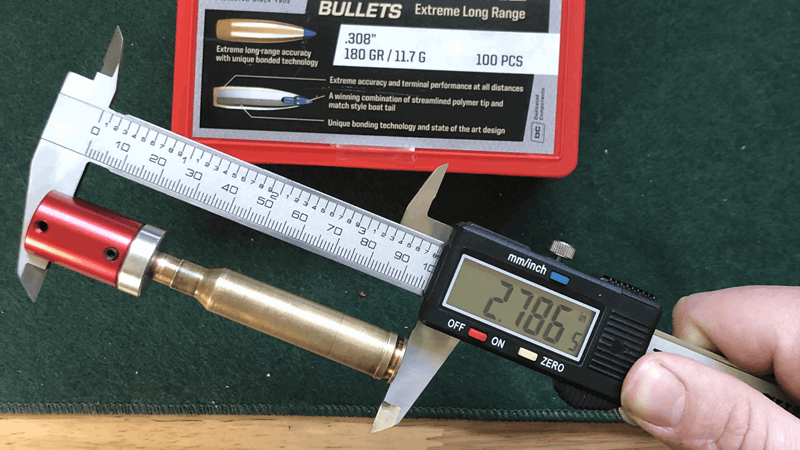
Figure 1: Showing how to measure cartridge base to ogive (CBTO).
After finding my max CBTO, I backed off .020” and decided to start there for seating depth. I have found great success from bullets liking some jump to the rifling, so I felt this was a safe place to start. I left this seating depth alone and didn’t change it until I went on to do a seating depth test.
After I prepped my brass and determined the cartridge base to ogive length, it was time to prime the cases. I used a Lee hand priming tool, but any priming tool will work. I prefer a hand priming tool because it gives excellent feel and control when seating primers. I like to be able to feel if the primer pockets in the brass have loosened up after being fired. I used Federal 215 large rifle magnum primers for this load. The Federal 215s are my preferred magnum primer. They provide excellent accuracy and consistency for me.
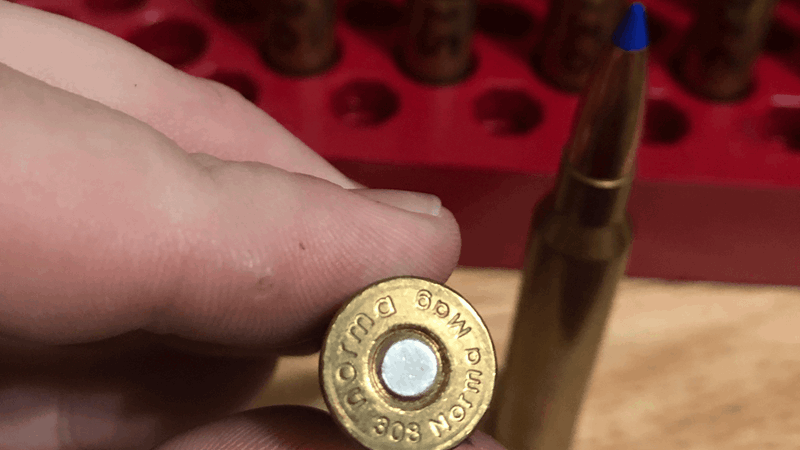
Figure 2: Freshly primed .308 Norma Magnum brass.
The next step is one of the most critical, and it’s extremely important to pay attention and double-check yourself when it comes time for powder. Please do not copy my loads before first consulting published data. It is critical to always start with a low charge and work up. Never just copy a load from anyone or use a load from a previous rifle. Always side with caution, and never overlook or mishandle powder. I am not responsible for any mishandling or any issues resulting from not following published data. It’s imperative to take good and accurate notes throughout load development and to only change one variable at a time.
I decided to test Alliant Reloder 26 (RL26) with these 180gr Bondstrikes. This powder has done amazing in this rifle with heavier bullet weights, and I knew I would have plenty of case capacity to utilize it with these projectiles. There isn’t much published for RL26 in the .308 Norma Magnum, but I have extensive data for it from past testing. My previous results showed 71.8gr of RL26 being max in my rifle with 215gr Berger Hybrids in new Norma brass.
From my experience, if a bullet is 10 grains heavier, I will figure about 1.0 gr less powder will be used to reach a safe max load. If the bullet is 10gr lighter than 1.0gr more powder will be needed to reach the max. This is not scientific and has exceptions, but it’s a rough idea to help determine what a safe starting load should be. For example, my 215gr Berger load with RL26 maxed out at 71.8gr of powder. The 180gr Bondstrike is 35 grains lighter, so before even testing any loads, I figured 75.5gr will be a max load. I obviously do not want to start at max, so I began testing at 71.0 grains. This powder charge is safe with 215gr bullets so it will be safe for the much lighter 180gr Norma bullets.
Once I had a starting load selected, I loaded a ten shot series of progressively higher charge weights. I started at 71.0gr and worked up in 0.5gr increments until reaching 75.5 grains. The plan with these loads was two-fold. The main goal was to look for pressure signs and find out where the max load is for this combination of components. The second focus is to look for a sweet spot in the powder charges. This is done by shooting all rounds at the same point of aim at 100 yards looking for multiple shots in a row to hit close to one another and forming a group. This gives a rough idea of where the optimal charge weight will be for this load. This style of load development is nothing new and has been used and proven effective by many highly skilled professional shooters and reloaders. It is different from my previous style of load development, but as you will see from my results, it is a very thorough and effective method that works great.

Figure 3: My custom .308 Norma Magnum at the range during testing.
Below, you can see the target that I shot with the 10 shot powder charge test. The red triangle on the target shows a group formed by charge weights 71.5gr to 73.0gr. This shows that a 1.5gr variation in powder formed a 4 shot group that measured 0.6 MOA. These are the results that you’re looking for in this style of test. From here, I chose 72.5gr as the middle of the node, and this is where I loaded for the seating depth test that followed.

Figure 4: The target from the initial 10 round test showing the group formed from 71.5gr to 73.0gr.
After I have found the rough powder charge node from my previous test, I chose the middle charge weight of 72.5gr and did a seating depth test. Seating depth is critical for accuracy. My testing has shown in some cases as small as .005” change in seating depth to make groups double in size or cut them in half. I like to do a rough seating depth test initially before moving on to anything else. I started these bullets at .020” off of the rifling and worked back to .060” off in .005” increments. I loaded three cartridges at each seating depth and used the same 72.5gr load in all of them.
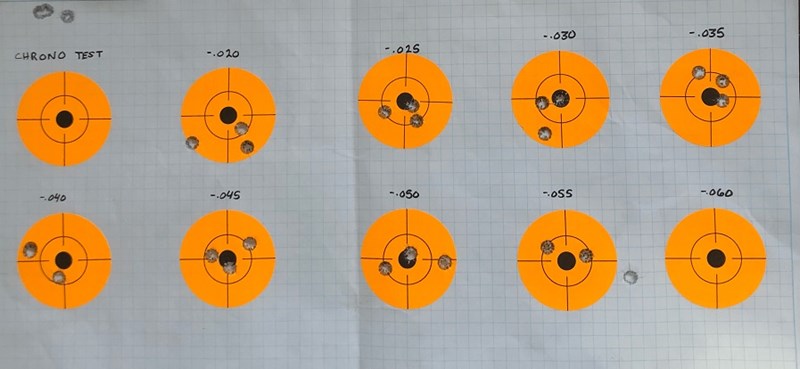
Figure 5: Seating depth test results.
The target above shows the results from my seating depth test with the 180gr Bondstrikes. I also tested 3 rounds over my Magnetospeed chronograph to get an idea of my velocity. Those 3 shots averaged 3090 FPS. I stopped testing at .055” off because the groups really started opening up at .050” and .055” off the lands. This test showed .025” to .035” having the smallest groups, but .025” and .030” had very similar points of impact so I knew that somewhere in there would be the seating depth node.
Once I had a rough idea of where my seating depth and charge weight nodes were, I moved on to finalizing the load. My next test fine-tuned the optimal charge weight (OCW) by testing charge weights in 0.2gr increments from 71.8gr to 72.8 grains. This one grain spread covered the center of my rough powder charge node I found earlier and gave the results I was looking for. I loaded 3 rounds at each charge weight and seated all bullets .025” off the rifling. Then I shot 3 shot groups with each load to plot their points of impact and test them for accuracy. Below are my results.
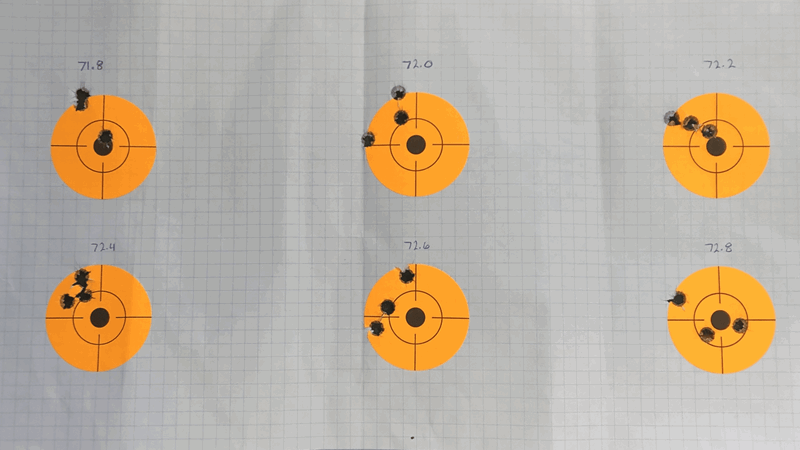
Figure 6: Powder charge testing results.
The results showed that 72.2gr and 72.4gr had the smallest groups and had very similar points of impact. The 72.4gr load showed a much nicer triangular shaped group, and that is a good sign. The 72.4gr load measured just under ½” and that was the type of performance I was looking for.
My final test was to take the 72.4gr load, which showed excellent accuracy from my past results and fine-tune the seating depth. I did this to squeeze out all the accuracy potential from these Norma Bondstrikes and really show what they’re capable of. I loaded 3 rounds each at .022”, .025”, and .028” off the lands to test for groups. Below are the results from that test. This test showed acceptable hunting accuracy at both .022” and .025” off of the rifling, but the .028” off load showed the best precision. The group measured 0.370 MOA with the .028” off load and I was impressed with this level of precision from a bonded hunting bullet.
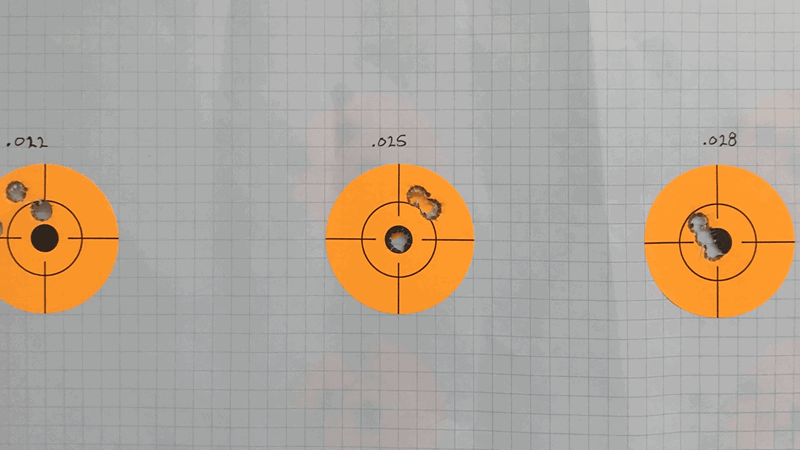
Figure 7: Results from fine tuning seating depth.
My overall impression of the Norma 180gr Bondstrike is that it’s an extremely well-designed hunting bullet that’s capable of excellent accuracy. I would feel confident taking these hunting, relying on them to hit where I’m aiming, and do the job. I plan to use these for hunting in the future and test them out at longer distances when I have access to a bigger range.
There are many bullet options on the market today, but I think Norma did something great with these Bondstrikes. From their dimensional consistency being match grade, to their heavy-duty construction, and their ability to shoot sub 0.5 MOA groups, these are amazing bullets. I will definitely be loading these in my rifle when it comes time to go hunting!
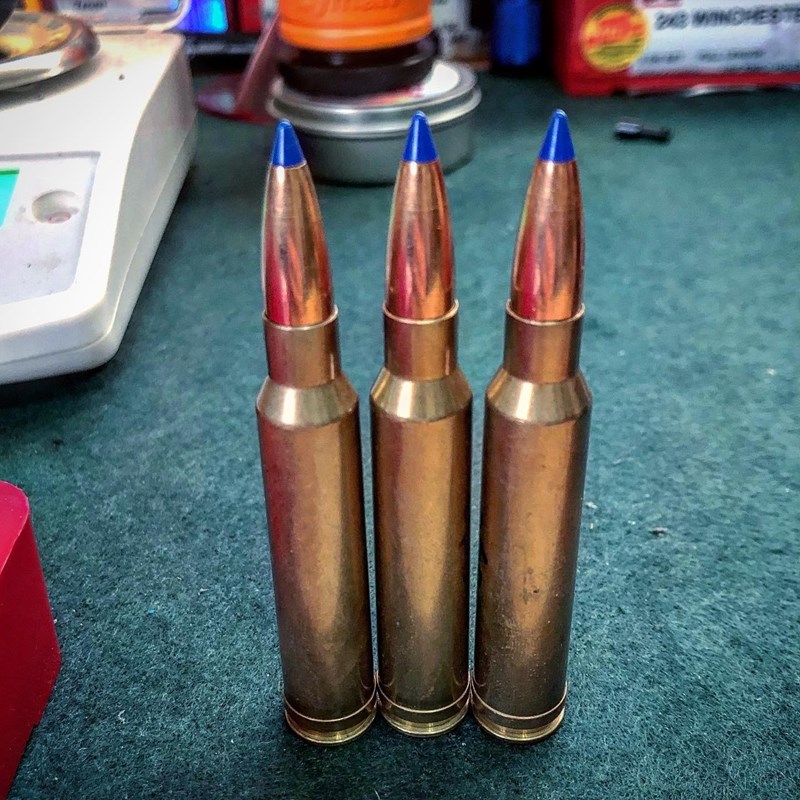
Figure 8: A trio of .308 Norma Magnum cartridges loaded with the 180gr Bondstrike.
Text: Jerry B. Bauduin